How to Import and Export Items in Bulk Using CSV in Your POS System
Managing your inventory efficiently is crucial to running a successful business. Our POS system provides a convenient way to import and export items in bulk, allowing you to easily update your stock or transfer data between systems. In this guide, we will walk you through the steps for importing and exporting items using a CSV file.
Why Use Bulk Import/Export?
Save time by adding or updating multiple products at once.
Reduce errors with structured CSV templates.
Backup inventory for security and reporting.
Transfer data between systems seamlessly.
Importing Items in Bulk:
Importing items in bulk allows you to quickly add or update multiple products in your inventory. Follow these steps to ensure a smooth import process:
Step 1: Download the CSV Template
To get started, download the CSV template from your POS system. This template provides the necessary structure for the import process, ensuring all fields are correctly aligned.
- Go to Menu > Items in your POS system. (Menu > Items).
- Click the More Options (⋮) icon. A pop-up menu will appear on your screen.
- Select Import Items and download the CSV template.

Step 2: Fill Out the Template
Once you have the template, open it in a spreadsheet program (such as Excel or Google Sheets). The template will contain the following fields:
| Field | Description | Example |
|---|---|---|
| Code | Unique product ID (required) | PROD001 |
| SKU | Stock Keeping Unit (optional) | SKU12345 |
| Barcode | Product barcode (optional) | 123456789 |
| Name | Product name (required) | Premium Coffee |
| Unit | Measurement unit (e.g., kg, piece) | piece |
| Category | Product category | Beverages |
| CostPerItem | Cost price | 10.00 |
| RetailPrice | Selling price | 15.99 |
| Tax | Tax percentage | 5 |
| EnablePOSSales | Available in-store? (True/False) | True |
| EnableOnlineSales | Available online? (True/False) | True |
| LoyaltyPointsEachSale | Points per sale | 10 |
| ShortDescription | Brief product description | 100% Arabica Coffee |
Important Notes:
Unique Codes: Each product must have a unique
Code.Correct Format: Ensure numbers use decimals (e.g.,
10.50).Save as CSV: Use CSV (Macintosh) (*.csv) or CSV (MS-DOS) (*.csv) format when saving.
Step 3: Save the File
Once you've filled out the template, save the file in .csv format. This format is required for the import process.
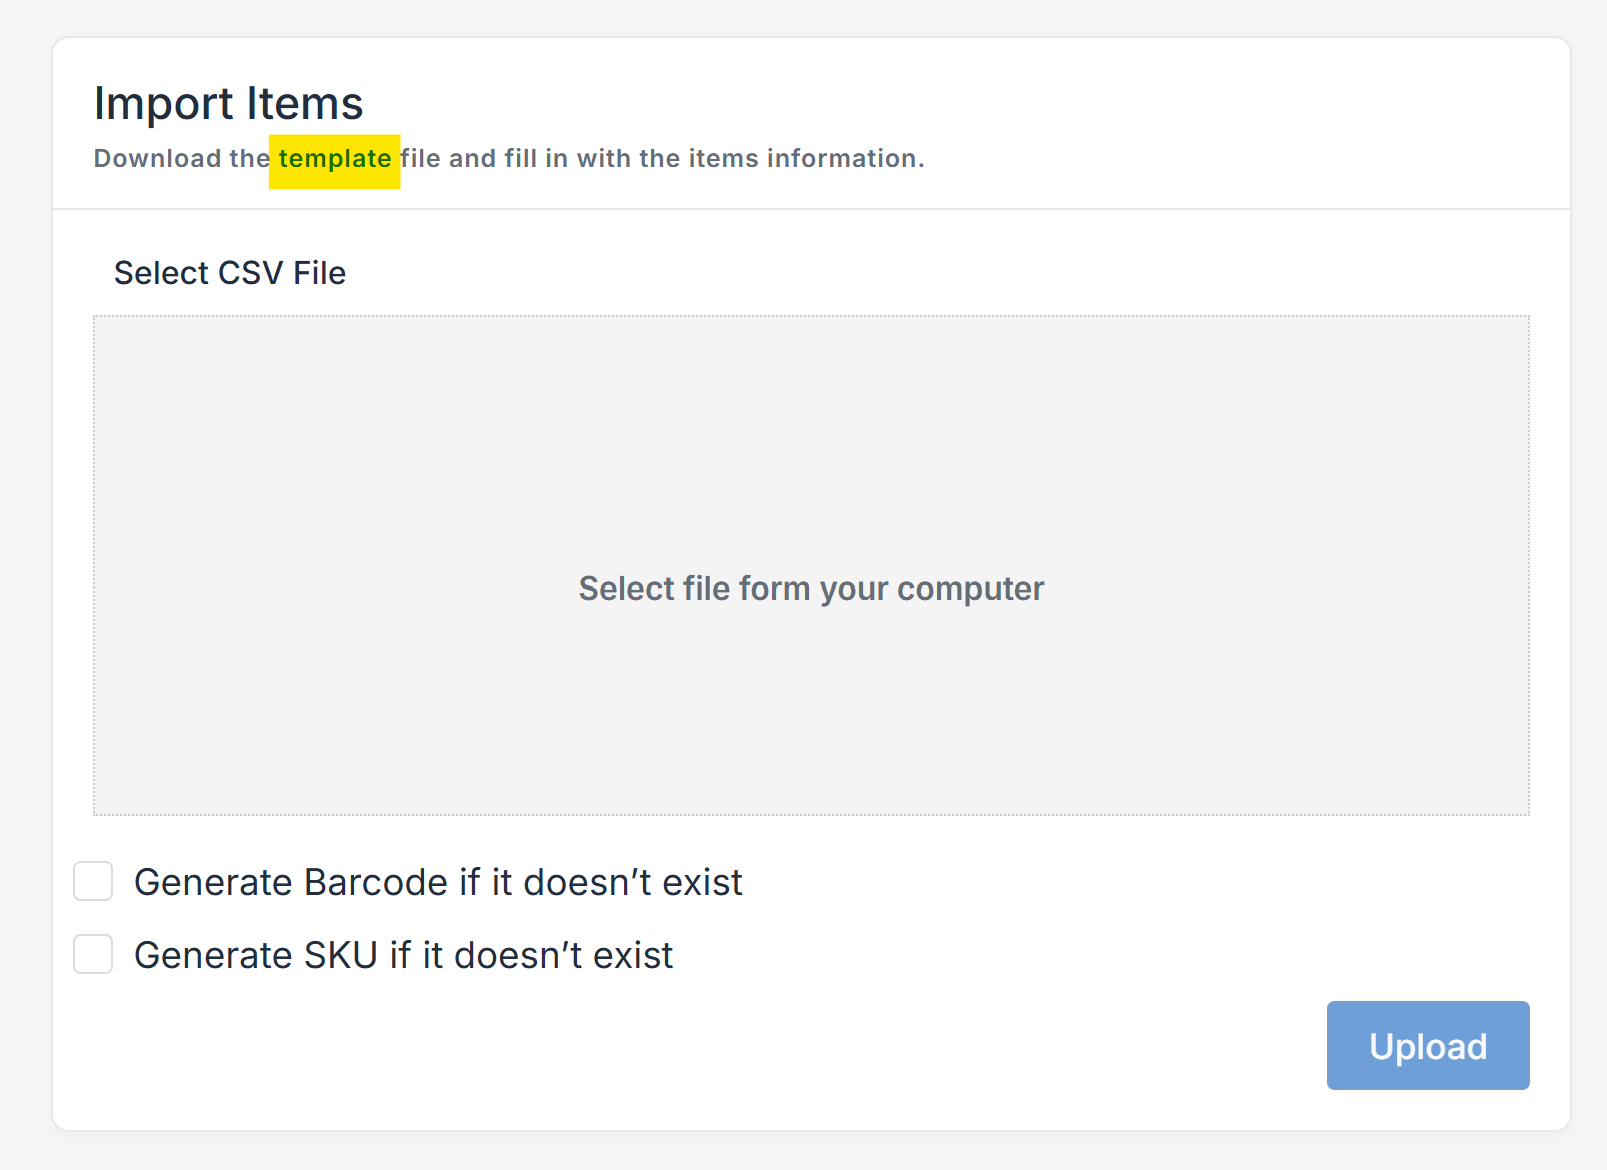
Step 4: Upload the CSV File
Go back to Menu > Items > Import Items.
Click Upload and select your CSV file.
- Enable options if needed:
- ✅ Generate Barcode if missing
- ✅ Generate SKU if missing
- Upload your filled-out CSV file, and the system will begin processing your data.
Step 5: Review and Confirm
After uploading, the system will validate your data. If there are any errors (such as missing required fields or invalid data formats), you will be prompted to correct them. Once the validation is successful, your items will be added to the inventory.
Common Import Errors & Fixes
❗ Error: Duplicate Code Detected
Empty Code:
This error occurs when the"Code"field is left empty in your CSV file.To fix this, enter a unique value in the
"Code"field and re-upload the file.You can use Microsoft Excel to generate unique codes automatically.
Duplicate Code:
This error occurs when two or more rows in your CSV contain the same"Code"value.
Each product must have a unique code. To resolve this, ensure that all
"Code"values are distinct before uploading.
❗ Error: Invalid data: you can ignore bad data by settings Baddata format
📝 Solution : How to Save Excel as Proper CSV
Open your Excel file. Click on File > Save As
Choose where you want to save.
In the "Save as type" dropdown, select:
✅
CSV (Macintosh) (*.csv)or
✅
CSV (MS-DOS) (*.csv)— if you have special characters.Click Save.


Exporting Items in Bulk
Exporting items allows you to download your entire inventory into a CSV file, which can be used for reporting, backups, or transferring data to other systems.
Step 1: Navigate to Export Items
- Navigate to the Items section in your POS system (Menu > Items).
- Click the More Options icon. A pop-up menu will appear on your screen.
- Select Import Items and download the CSV template.

Step 2: Download the CSV File
After selecting your options, click Export. The POS system will generate a CSV file containing your inventory data, which you can then download and open in a spreadsheet program.
Tips for Importing and Exporting Items
- Back up your data: Before importing large batches of items, consider exporting your current inventory as a backup.
- Data validation: Ensure that your CSV files are free of errors before importing to avoid issues with data entry.
- Use unique codes: Always use unique item codes to prevent conflicts when importing or updating items.
By using the bulk import and export features, you can easily manage large inventories and ensure your POS system stays up to date with minimal manual input.